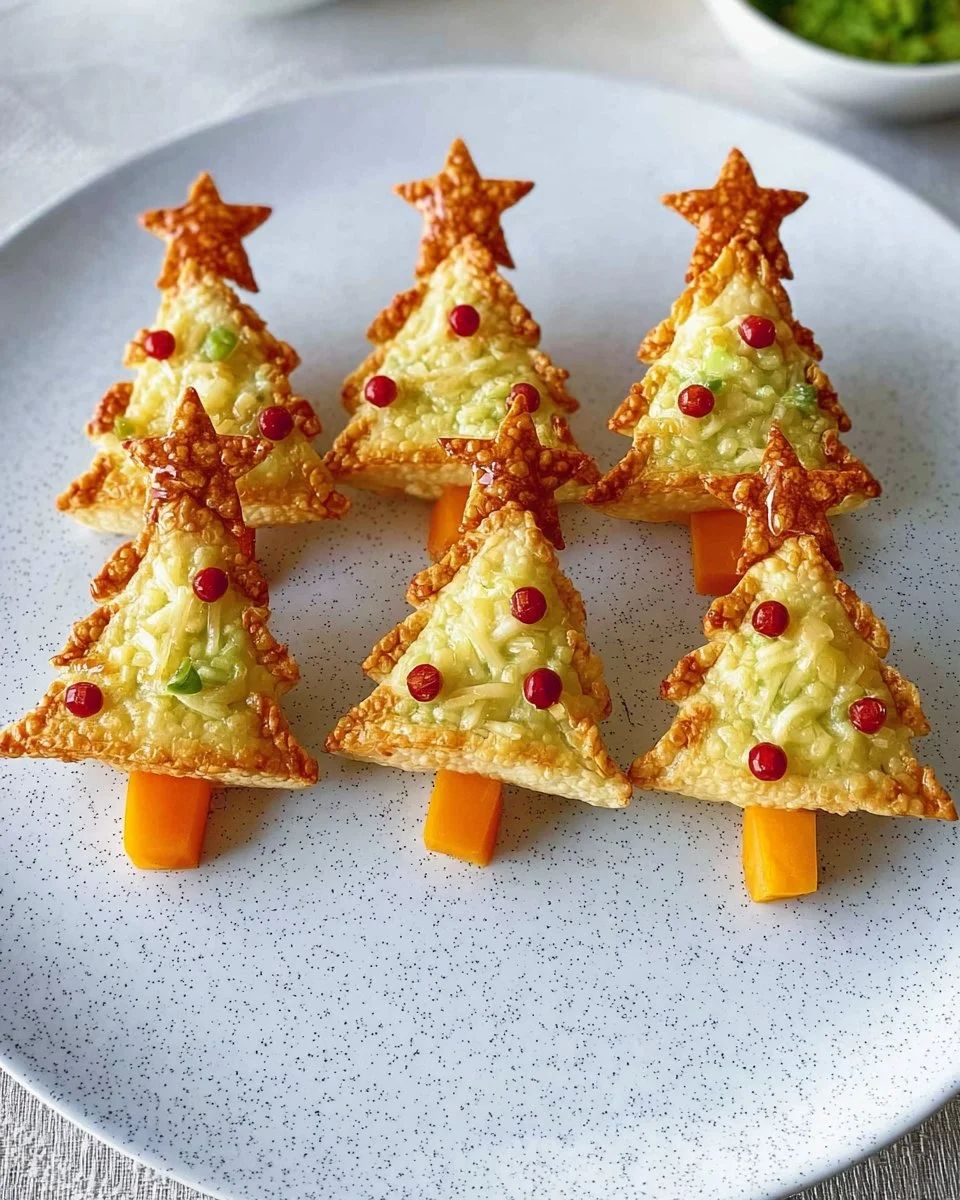
Pita Christmas Trees are a fun and festive treat that adds a touch of whimsy to holiday snacks. These cute little trees made with whole-grain mini pitas are perfect for parties, family gatherings, or simply for a cozy night in. They are easy to make and allow for creativity with toppings, making each Christmas tree unique and personal. Whether you are looking for a healthy snack option or a delightful appetizer, Pita Christmas Trees fit the bill perfectly.
WHY YOU WILL LOVE THIS RECIPE
There are many reasons to love Pita Christmas Trees. First, they are simple to prepare and do not require any complicated cooking techniques. Even beginners in the kitchen can whip up these delicious treats quickly. The recipe is very versatile, allowing everyone to customize their trees with their favorite vegetables and toppings.
Another great reason to love this recipe is how visually appealing it is. The vibrant colors of the vegetables alongside the green avocado spread create a perfect festive look. They are sure to bring smiles to both kids and adults alike, making them a hit at any holiday gathering.
Additionally, Pita Christmas Trees can be a healthier option compared to traditional holiday snacks. They are packed with nutrients from the vegetables and avocado, offering a nutritious alternative to sweets and heavy foods often found during the holidays.
Together, these reasons make Pita Christmas Trees not just a recipe, but an enjoyable experience for everyone involved.
HOW TO MAKE Pita Christmas Trees
Making Pita Christmas Trees is a straightforward process that can be completed in just a few steps. Gather your ingredients, follow the instructions carefully, and you will have a beautiful edible decoration to share.
EQUIPMENT NEEDED
To create your Pita Christmas Trees, you will need some basic kitchen tools. Here is what you will need:
- A cutting board
- A sharp knife
- A small mixing bowl
- A spoon for mashing
- A cookie cutter (for the cheese stars)
- A serving platter
With these tools and your ingredients ready, you are all set to enjoy making these festive treats.
Ingredients You’ll Need:
- Whole-grain mini pitas
- Pretzel sticks
- Avocado
- Lime juice
- Garlic powder
- Salt
- Cheese slices
- Assorted veggies (like bell peppers, cucumbers, and cherry tomatoes)
STEP-BY-STEP INSTRUCTIONS :
- Cut the pitas into wedges. Start by taking each mini pita and cutting it into triangle shapes. This will create the tree-like shape for each piece. Set these aside once cut.
- Break the pretzel sticks in half and poke one into the bottom of each pita. The pretzel stick will act as the trunk of the tree and will help it stand up.
- Mash the avocado with lime juice, garlic powder, and salt to taste. Use a bowl and a spoon to combine the ingredients until smooth. This will be the “greenery” that you spread on your pita.
- Cut out stars from the cheese. Use a small cookie cutter to cut star shapes from your cheese slices. These will be the decorations at the top of your tree.
- Decorate the Christmas trees using assorted veggies. Use your vegetables to add color and texture. You can cut them into small pieces and arrange them on the tree for a festive look.

HOW TO SERVE Pita Christmas Trees
Pita Christmas Trees are best served fresh. You can arrange them nicely on a platter and serve them as an appetizer. They can also be a fun addition to a holiday buffet. For added visual appeal, you can sprinkle a few extra vegetable pieces around the trees on the platter.
These treats can be enjoyed as a healthy snack throughout the holiday season. Kids will love picking their favorites and decorating them as they please.
STORAGE & FREEZING : Pita Christmas Trees
Pita Christmas Trees are best eaten the same day for maximum freshness. However, if you have leftovers, you can store them in an airtight container in the refrigerator. They should be consumed within 1-2 days.
Freezing is not recommended for this recipe as the ingredients may lose their texture and taste once thawed. It is better to prepare them fresh for the best experience.
SERVING SUGGESTIONS
Pita Christmas Trees can be served alongside various dips such as hummus, tzatziki, or a yogurt-based dressing. These dips will enhance the flavor and make the experience even more enjoyable. Consider serving a selection of dips to cater to all tastes.
You can also offer different toppings like nuts or seeds for some added crunch. This will give guests the option to customize each tree according to their preference.
VARIATIONS
Pita Christmas Trees can easily be modified to suit different tastes. Here are a few fun variations:
- Cheese Variety: Use different types of cheese like cheddar, mozzarella, or goat cheese to create variety in taste.
- Use Different Vegetables: You can get creative with your veggie choices. Try using mini olives, shredded carrots, or radishes for a unique twist.
- Add Protein: Incorporate sliced turkey or chicken for an added protein boost. This will make the trees more filling.
- Spice it Up: Add a sprinkle of chili flakes or a drizzle of hot sauce to satisfy those looking for a little heat.
FAQs
1. Can I use regular pitas instead of mini ones?
Yes, you can use larger pitas. Just cut them into smaller triangles or wedges that are manageable for snacking.
2. How can I make these vegan?
Simply omit cheese and use a vegan cream cheese spread to replace the avocado mixture.
3. Can children help make Pita Christmas Trees?
Absolutely! Kids can help by assembling the trees and decorating them, making this a fun family activity.
4. How long does it take to prepare Pita Christmas Trees?
The prep time is about 15-20 minutes, making it a quick and easy recipe to create.
MAKE-AHEAD TIPS FOR Pita Christmas Trees
To save time, you can prepare some parts of the Pita Christmas Trees in advance. Here are some helpful tips:
- Prepare the Avocado Spread: You can mash the avocado mixture ahead of time. Make sure to store it in an airtight container and cover the surface with plastic wrap to prevent browning.
- Cut Vegetables Ahead: Chop your veggies in advance and store them in a sealed container in the fridge. This will save you time when you are ready to assemble.
- Assemble Last Minute: To keep everything fresh, try to assemble your Pita Christmas Trees right before serving. This will ensure that the ingredients remain crisp and flavorful.
With these tips, you will be ready to enjoy Pita Christmas Trees at a moment’s notice!
Print
Pita Christmas Trees
Festive and fun Pita Christmas Trees made with whole-grain mini pitas, perfect for parties and gatherings.
- Total Time: 15 minutes
- Yield: 4 servings
Ingredients
- Whole-grain mini pitas
- Pretzel sticks
- Avocado
- Lime juice
- Garlic powder
- Salt
- Cheese slices
- Assorted veggies (bell peppers, cucumbers, cherry tomatoes)
Instructions
- Cut the pitas into wedges to create triangle shapes for the tree.
- Break the pretzel sticks in half and poke one into the bottom of each pita to act as the trunk.
- Mash the avocado with lime juice, garlic powder, and salt to create a smooth spread.
- Cut out stars from the cheese using a cookie cutter.
- Decorate the Christmas trees with assorted veggies.
Notes
Best served fresh; can be enjoyed with dips like hummus or tzatziki.
- Prep Time: 15 minutes
- Cook Time: 0 minutes
- Category: Appetizer
- Method: No cooking required
- Cuisine: International
- Diet: Vegetarian
Nutrition
- Serving Size: 1 serving
- Calories: 150
- Sugar: 2g
- Sodium: 250mg
- Fat: 10g
- Saturated Fat: 2g
- Unsaturated Fat: 6g
- Trans Fat: 0g
- Carbohydrates: 14g
- Fiber: 4g
- Protein: 3g
- Cholesterol: 10mg
Keywords: Christmas, appetizer, festive snack, family activity