INTRODUCTION
Yogurt has been a beloved food for thousands of years. It is creamy, delicious, and packed with nutrients. Making homemade yogurt can be simple and rewarding. With just a few ingredients and a little patience, you can create your own fresh yogurt at home. You can enjoy it plain, sweetened, or with your favorite fruits. The best part is that you have full control over the flavor and texture. This article will guide you through the process of making homemade yogurt.
WHY YOU WILL LOVE THIS RECIPE
There are many reasons to love making your own yogurt. First, it’s a great way to know exactly what is in your food. Store-bought yogurt often has added sugars and preservatives. When you make yogurt at home, you can keep it simple and clean. Plus, homemade yogurt is fresher and tastier than most store-bought options.
Another great reason is cost. Buying yogurt regularly can add up. Making it at home is cheaper and you can make larger batches. This means you always have some on hand for breakfast, snacks, or smoothies.
You will also love the versatility of homemade yogurt. You can eat it plain, mix in fruits, or drizzle some honey for sweetness. You can also use it in recipes like smoothies, dressings, or marinades. It becomes an ingredient you can use in so many delicious ways!
HOW TO MAKE Homemade Yogurt
Making homemade yogurt is easier than you might think. With just milk and a bit of yogurt as a starter, you can create a delicious product at home. Let’s dive into the steps of making this wonderful treat.
EQUIPMENT NEEDED
- A 4-quart saucepan or pot
- Instant-read thermometer
- Whisk
- Lid for the pot
- Oven (turned off) with the light on
- Cheesecloth (optional, for Greek-style yogurt)
- Fine sieve (optional, for Greek-style yogurt)
- Airtight container for storage
Ingredients You’ll Need
- 1/2 gallon whole milk (pasteurized and homogenized)
- 1 (5.3oz) container plain yogurt or plain Greek yogurt, preferably whole
STEP-BY-STEP INSTRUCTIONS
-
Pour the milk: Start by pouring the milk into a 4-quart saucepan or pot.
-
Heat the milk: Heat the milk over medium heat. Stir it frequently to prevent it from burning.
-
Check the temperature: Use an instant-read thermometer to check the temperature. The milk should reach about 180 to 190 degrees Fahrenheit.
-
Remove from heat: Once the milk has reached the correct temperature, remove it from the heat.
-
Cool the milk: Let the milk cool until it reaches 110 degrees Fahrenheit. This step is important.
-
Add yogurt: Once the milk has cooled, whisk in the plain yogurt. Make sure it is well combined.
-
Cover the pot: Place a lid on the pot. This helps keep the heat in.
-
Transfer to the oven: Move the pot to the oven. Make sure the oven is turned off, but keep the light on. The light will create a warm environment for the yogurt.
-
Let it rest: Allow the yogurt to sit in the oven for 10 to 12 hours. This is when it thickens and develops flavor.
-
Chill the yogurt: After resting, take the pot out of the oven and transfer the yogurt to the fridge. Let it chill for at least 4 hours.
-
Strain for Greek yogurt (optional): If you want thicker Greek-style yogurt, place the yogurt in cheesecloth set over a fine sieve. Let it strain for 2 to 4 hours to remove some of the whey.
-
Sweeten and serve: When you are ready to serve, you can sweeten the yogurt with honey, stevia, or sugar. You can also add vanilla or berries for extra flavor.
-
Store yogurt: Keep any unsweetened yogurt in the fridge. Store it in an airtight container for about 1 to 2 weeks.
HOW TO SERVE Homemade Yogurt
Homemade yogurt is very versatile. You can serve it in many different ways. Here are some ideas:
-
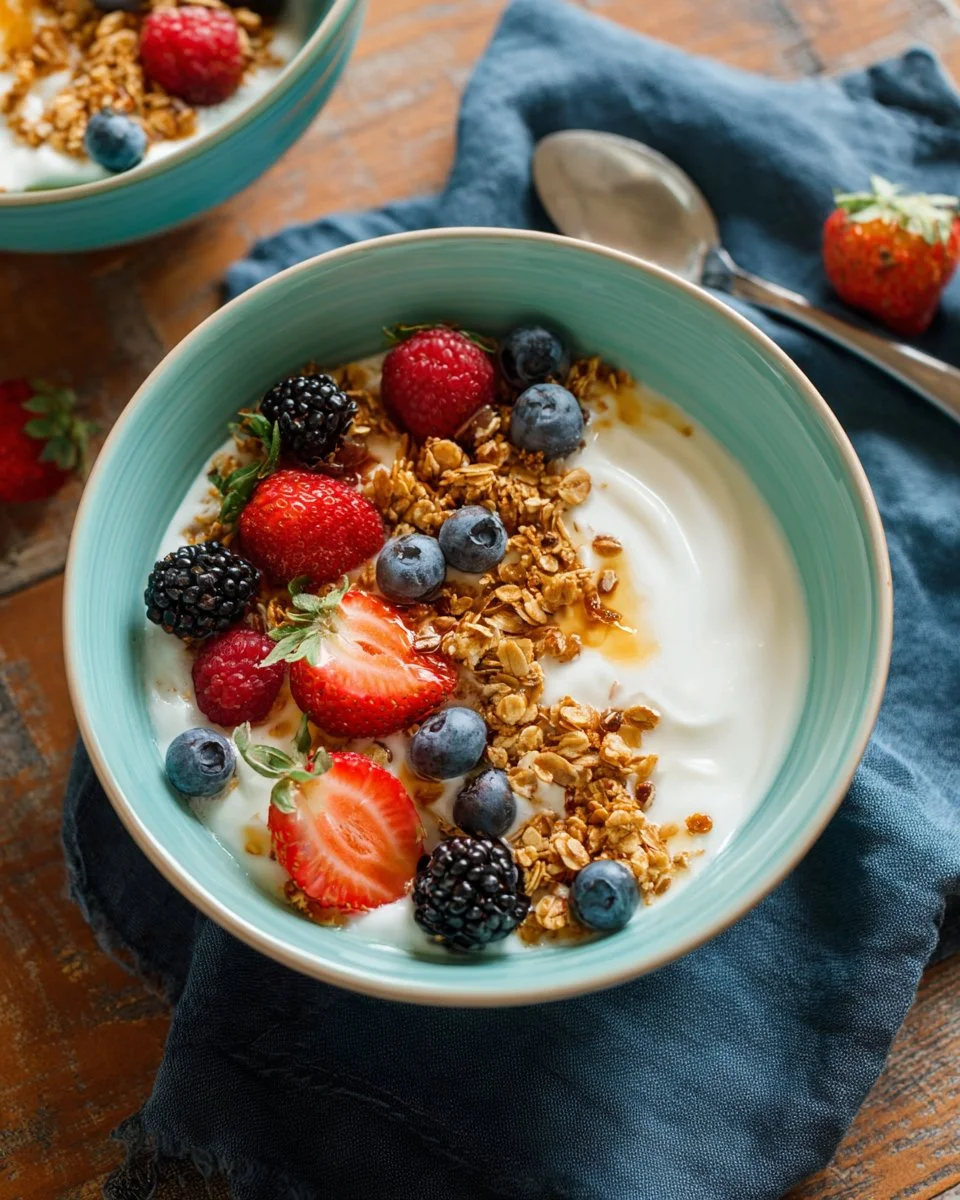
For breakfast: Start your day with a bowl of yogurt topped with fresh fruits like berries or bananas. You can also add nuts or granola for crunch.
-
As a snack: Enjoy yogurt as a quick snack. You can mix in honey or maple syrup for sweetness.
-
In smoothies: Blend yogurt into your favorite smoothie recipes for added creaminess and nutrition.
-
With meals: Use yogurt as a base for salad dressings or dips. It can also be a great topping for dishes like curry or spicy foods.
STORAGE & FREEZING: Homemade Yogurt
Homemade yogurt can last in the fridge for about 1 to 2 weeks when stored in an airtight container. It is best to eat it fresh, but you can also freeze yogurt.
To freeze yogurt, place it in a freezer-safe container. It can last for about 1 to 2 months in the freezer. Keep in mind that the texture may change a bit once thawed. It is best to use frozen yogurt in smoothies or recipes where texture is less critical.
SERVING SUGGESTIONS
Serving suggestions for homemade yogurt include:
- Drizzling honey or maple syrup on top.
- Mixing in fresh or frozen fruits for flavor.
- Adding a sprinkle of cinnamon or cocoa powder.
- Stirring in some nuts or seeds for added crunch.
Experiment with different flavors to find your favorite combination.
VARIATIONS
There are many ways to enjoy homemade yogurt:
-
Flavored Yogurt: Add pure vanilla extract or a dash of fruit puree for quick flavoring.
-
Greek Yogurt: For thicker yogurt similar to Greek yogurt, strain the yogurt as described above in the instructions.
-
Dairy-Free Options: If you want a dairy-free version, try using coconut milk or almond milk. Just make sure to add a probiotic starter culture.
-
Savory Yogurt: Mix yogurt with herbs and spices to create a savory dip. This can be a tasty alternative to sour cream.
FAQs
1. Can I use low-fat or skim milk?
You can use low-fat or skim milk, but whole milk gives the best creaminess and flavor.
2. What if my yogurt didn’t thicken?
If the yogurt doesn’t thicken, it may have been too cool when you mixed in the yogurt starter. Make sure to follow the temperature guidelines closely.
3. How do I know if my yogurt is safe to eat?
Make sure it smells pleasant, and there are no unusual colors or mold. If everything seems normal, it should be safe.
4. Can I reuse the yogurt as a starter?
Yes! You can save a small amount of yogurt from your current batch to use as a starter for the next batch.
MAKE-AHEAD TIPS FOR Homemade Yogurt
To get a jump on your yogurt-making, you can prepare in advance. You can heat the milk the night before and let it cool. In the morning, you just need to mix in the yogurt and let it sit.
Another tip is to keep some yogurt as a starter for your next batch. This way, you can have fresh homemade yogurt whenever you want! Cooking should be fun and making yogurt is a great way to enjoy this process!
Enjoy making your homemade yogurt, and remember, there is no right or wrong way to enjoy it. Try out different flavors and toppings to find what makes you happiest. Your kitchen will smell wonderful, and your taste buds will thank you!
Print
Homemade Yogurt
Learn to make delicious homemade yogurt with just milk and a bit of yogurt as a starter. This recipe is simple, versatile, and cost-effective.
- Total Time: 12 hours 15 minutes
- Yield: 4 servings 1x
Ingredients
- 1/2 gallon whole milk (pasteurized and homogenized)
- 1 (5.3oz) container plain yogurt or plain Greek yogurt, preferably whole
Instructions
- Start by pouring the milk into a 4-quart saucepan or pot.
- Heat the milk over medium heat, stirring frequently to prevent it from burning.
- Check the temperature with an instant-read thermometer; the milk should reach about 180 to 190 degrees Fahrenheit.
- Once the milk has reached the correct temperature, remove it from the heat.
- Let the milk cool until it reaches 110 degrees Fahrenheit.
- Whisk in the plain yogurt until well combined.
- Place a lid on the pot to keep the heat in.
- Move the pot to the oven (turned off) with the light on to create a warm environment for the yogurt.
- Allow the yogurt to sit in the oven for 10 to 12 hours to thicken and develop flavor.
- After resting, transfer the yogurt to the fridge and chill for at least 4 hours.
- If making Greek yogurt, strain the yogurt using cheesecloth over a fine sieve for 2 to 4 hours.
- When ready to serve, sweeten with honey, stevia, or sugar and add extra flavors such as vanilla or berries.
- Store any unsweetened yogurt in an airtight container in the fridge for about 1 to 2 weeks.
Notes
Feel free to experiment with different toppings and flavors. Store yogurt in the refrigerator or freeze for 1 to 2 months.
- Prep Time: 15 minutes
- Cook Time: 12 hours
- Category: Dairy
- Method: Uncooked
- Cuisine: American
- Diet: Vegetarian
Nutrition
- Serving Size: 1 serving
- Calories: 150
- Sugar: 7g
- Sodium: 100mg
- Fat: 8g
- Saturated Fat: 5g
- Unsaturated Fat: 2g
- Trans Fat: 0g
- Carbohydrates: 12g
- Fiber: 0g
- Protein: 8g
- Cholesterol: 30mg
Keywords: yogurt, homemade yogurt, dairy, easy recipe