After a long day at school, kids often feel hungry and need a little pick-me-up. Healthy snacks are a great way to fill that hunger and give them energy. Clean eating snacks are made with whole, natural ingredients that are good for their bodies. This article will give you several fun and easy clean eating snack ideas, perfect for after school.
WHY YOU WILL LOVE THIS RECIPE
These clean eating after school snack ideas are simple to make and taste great. You can use ingredients that you probably already have at home. They are healthy, filling, and easy for kids to eat. You won’t have to worry about unhealthy snacks filled with sugar or empty calories. Instead, you will provide snacks that help kids grow strong and feel good.
HOW TO MAKE Clean Eating After School Snack Ideas
Making these snacks is easy and fun. You can involve your kids in the kitchen, letting them help with mixing and preparing. They will love the snacks even more when they help make them. Here you can find a variety of clean eating snack ideas like energy balls, fruit and veggie dips, and more.
EQUIPMENT NEEDED
To prepare clean eating snacks, you will need some basic kitchen tools:
- Mixing bowls
- Measuring cups and spoons
- A blender or food processor (for energy balls and smoothies)
- Baking sheets (for baked snacks)
- Containers for storing snacks

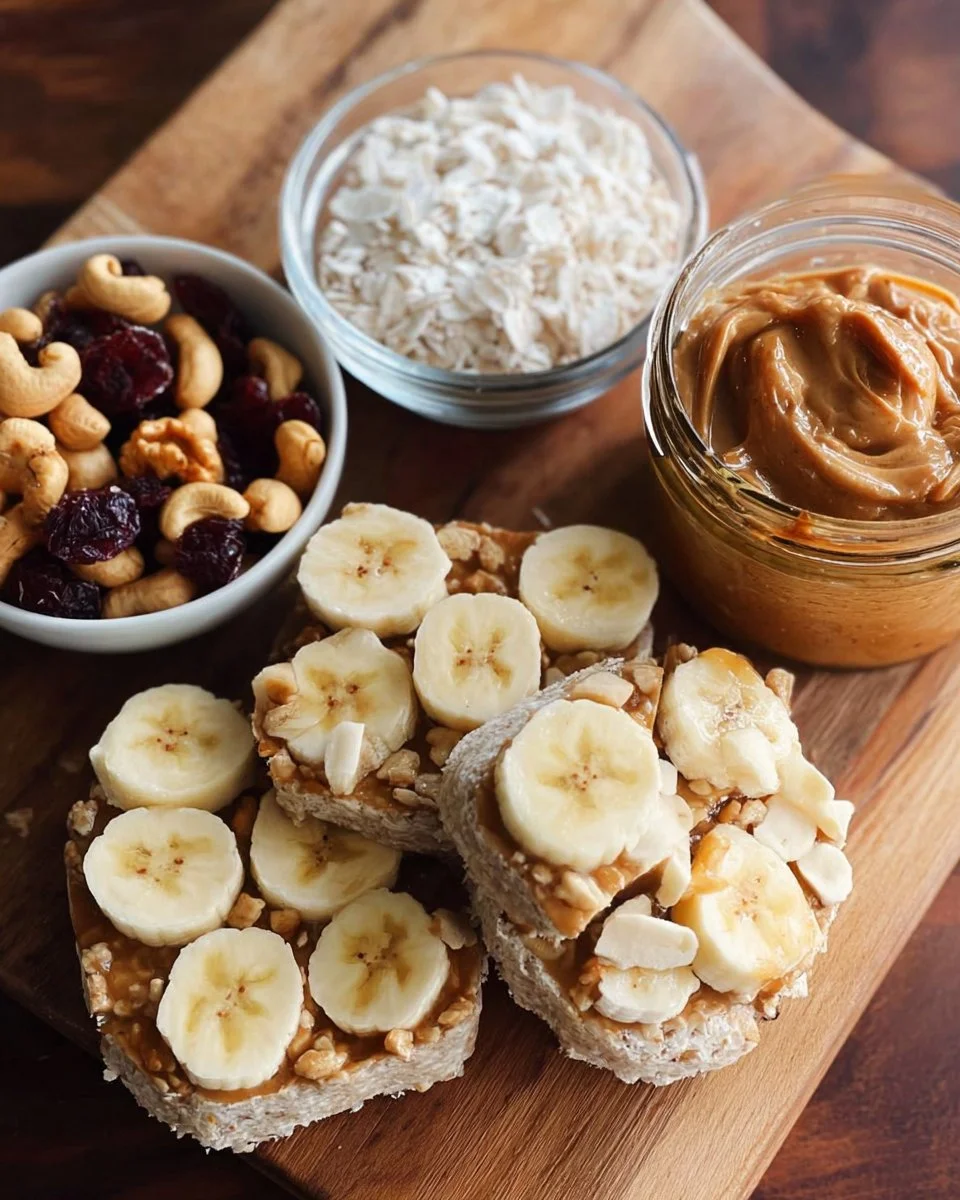
Ingredients You’ll Need:
Here are some basic ingredients you might need for clean eating after school snacks:
- Oats
- Peanut butter or almond butter
- Honey or maple syrup
- Fresh fruits like bananas, apples, and berries
- Vegetables like carrots, cucumbers, and bell peppers
- Greek yogurt
- Nuts and seeds
- Whole grain crackers
- Natural spices like cinnamon
STEP-BY-STEP INSTRUCTIONS:
Here is a basic process to prepare one of the delicious clean eating snack ideas:
- Choose Your Recipe: Pick one of the clean eating snack ideas you want to try.
- Gather Ingredients: Collect all the ingredients you need from the list above.
- Prepare Your Mixing Area: Clear a space in the kitchen. Make sure you have your bowls and tools ready.
- Mix Ingredients: Follow the instructions for your chosen recipe. For example, if you’re making energy balls, mix oats, peanut butter, honey, and any extras like chocolate chips or nuts.
- Shape Your Snacks: Roll mixture into small balls or spread out on a baking sheet, depending on your recipe.
- Bake or Chill: If your snack needs baking, place it in the oven. If it needs chilling, put it in the fridge for a while.
- Cool and Serve: Once cooked or chilled, take them out, let them cool, and serve immediately or store them for later.
HOW TO SERVE Clean Eating After School Snack Ideas
You can serve these snacks right away after making them. Arrange them nicely on a plate or in a bowl. Kids will love to eat them fresh. You can also let kids pick and choose their favorites from a variety of snacks.
STORAGE & FREEZING: Clean Eating After School Snack Ideas
Store your clean eating snacks in airtight containers. They can keep in the fridge for about a week. If you want to freeze them, wrap them tightly and place them in the freezer. They should last for about a month. Just thaw them in the fridge overnight when you are ready to eat.
SERVING SUGGESTIONS
You can serve these snacks with dips or sides. For example, pair fresh fruit with yogurt or veggies with hummus. Adding a healthy drink, like water or a smoothie, will make a complete snack.
VARIATIONS
There are many ways to change these clean eating snacks. You can substitute ingredients based on what you have at home:
- Fruits: Use different fruits like grapes or oranges.
- Nuts: Swap out peanut butter for almond butter or sunflower seed butter.
- Grains: Try using quinoa instead of oats for added protein.
- Sweeteners: Change honey for agave syrup or apple sauce.
FAQs
1. Can I make these snacks ahead of time?
Yes! Many of these snacks can be made ahead of time and stored for later.
2. Are these snacks suitable for kids with allergies?
You can modify the ingredients to avoid allergens. Use alternative butters or milk suitable for allergies.
3. How long do these snacks last?
Most snacks will stay fresh in the fridge for about a week. If frozen, they can last for a month.
4. Can I involve my kids in the kitchen?
Absolutely! Letting kids help makes them more excited to eat healthy snacks.
MAKE-AHEAD TIPS FOR Clean Eating After School Snack Ideas
To save time, you can prepare a batch of snacks during the weekend. Store them in single servings in containers. This way, your kids can easily grab a snack when they come home from school. You can also choose recipes that freeze well to have healthy snacks ready anytime you need them. This not only ensures that kids have healthy options but also makes snack time less stressful for parents.
With these clean eating after school snack ideas, you can keep your kids healthy and happy after a busy day at school. Enjoy your time in the kitchen and have fun creating these delicious snacks together!
Print
Clean Eating After School Snack Ideas
Simple and healthy snack ideas made with whole, natural ingredients that kids will love after school.
- Total Time: 30 minutes
- Yield: 4 servings
Ingredients
- Oats
- Peanut butter or almond butter
- Honey or maple syrup
- Fresh fruits (bananas, apples, berries)
- Vegetables (carrots, cucumbers, bell peppers)
- Greek yogurt
- Nuts and seeds
- Whole grain crackers
- Natural spices (cinnamon)
Instructions
- Choose Your Recipe: Pick one of the clean eating snack ideas you want to try.
- Gather Ingredients: Collect all the ingredients you need from the list above.
- Prepare Your Mixing Area: Clear a space in the kitchen. Make sure you have your bowls and tools ready.
- Mix Ingredients: Follow the instructions for your chosen recipe.
- Shape Your Snacks: Roll mixture into small balls or spread out on a baking sheet, depending on your recipe.
- Bake or Chill: If your snack needs baking, place it in the oven. If it needs chilling, put it in the fridge for a while.
- Cool and Serve: Once cooked or chilled, let them cool and serve immediately or store them for later.
Notes
Store snacks in airtight containers for up to a week in the fridge or freeze for about a month. Involve kids in the kitchen to make them excited about healthy eating.
- Prep Time: 15 minutes
- Cook Time: 15 minutes
- Category: Snack
- Method: No-Cook/Baking
- Cuisine: American
- Diet: Vegetarian
Nutrition
- Serving Size: 1 serving
- Calories: 250
- Sugar: 7g
- Sodium: 150mg
- Fat: 10g
- Saturated Fat: 2g
- Unsaturated Fat: 8g
- Trans Fat: 0g
- Carbohydrates: 30g
- Fiber: 4g
- Protein: 8g
- Cholesterol: 0mg
Keywords: snacks, healthy, clean eating, after school, kids, energy balls, fresh fruits, vegetables