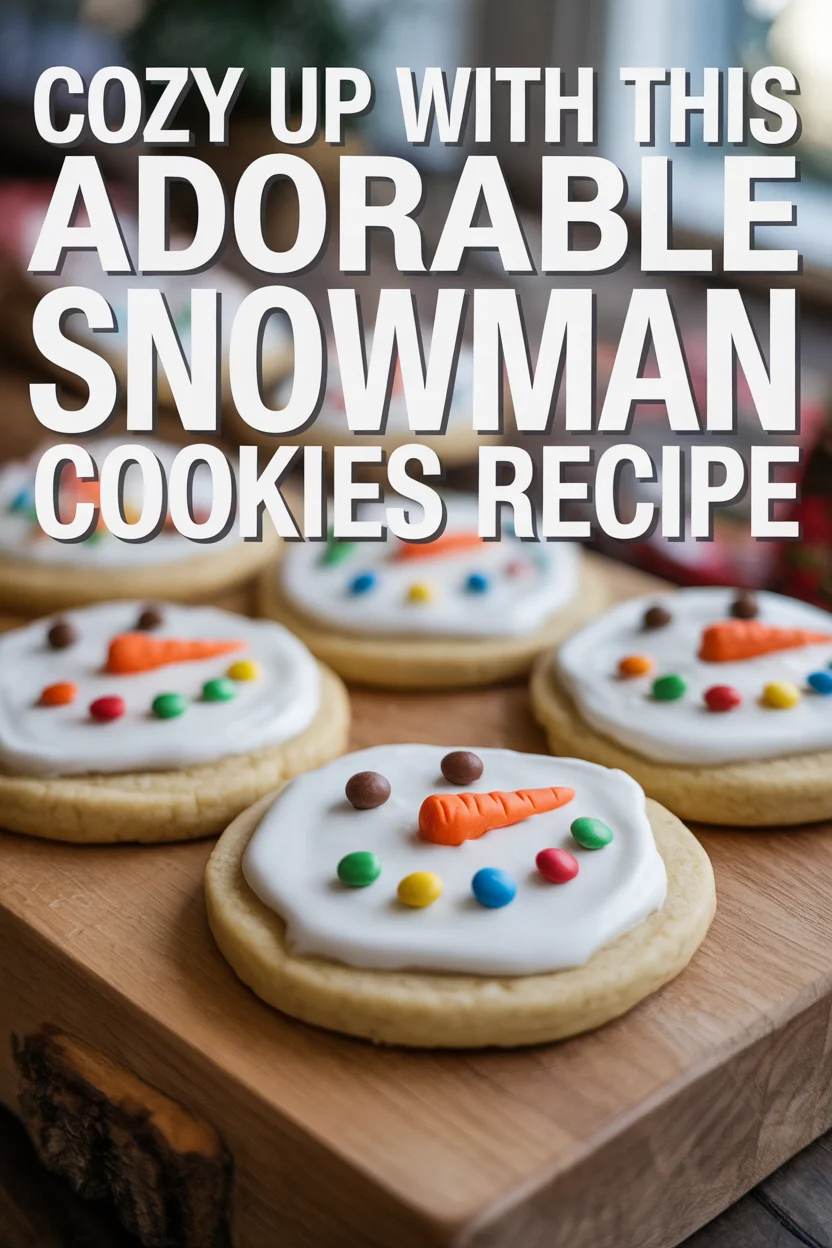
Snowman Cookies Recipe is exactly what I reach for when the weather turns cold and I want a little sweet project that doubles as a cozy afternoon activity. Maybe you have kids tugging at your sleeve asking to decorate something fun. Or maybe you just want a plate of cute treats for a holiday movie night. Either way, this is one of those recipes that looks impressive but is totally doable at home. We will keep the steps simple, the ingredients familiar, and the decorating relaxed. If you like festive bakes, check out these adorable Christmas tree cookies too.

Sugar Cookie Steps
Ingredients
- 1 cup unsalted butter, softened
- 3/4 cup granulated sugar
- 1 large egg, room temperature
- 2 teaspoons vanilla extract
- 2 and 1/2 cups all purpose flour, spooned and leveled
- 1 teaspoon baking powder
- 1/2 teaspoon fine salt
Directions
- Cream butter and sugar in a large bowl until light and fluffy. You are looking for a soft, pale paste that pulls away from the bowl.
- Beat in the egg and vanilla until smooth.
- Whisk flour, baking powder, and salt in a separate bowl. Add to the wet mixture and mix on low just until combined. The dough should be soft but not sticky.
- Divide dough in half, flatten into disks, and wrap well. Chill 45 to 60 minutes until firm around the edges.
- Roll dough on lightly floured parchment to about 1/4 inch thickness. Cut circles for heads and slightly larger circles for bodies. Re roll scraps once for best texture.
- Transfer to a parchment lined sheet and chill 10 minutes so the shapes hold.
- Bake at 350 F for 8 to 10 minutes, just until the edges look set and the tops lose their shine. Keep them pale for a tender bite.
- Cool completely before icing.
These are basic, reliable sugar cookies that stay soft for days and keep their shape. If you enjoy shortbread style bakes with a twist, you might love these fragrant apricot rosemary thumbprint cookies too. Once your cookies cool, we can move on to the fun part. I like to keep the decorating stress free and focus on a few simple details that pop.

My Sugar Cookie Trick
Everyone wants cookies that are neat, soft, and not puffed out of shape. Here is the trick I use every time. I roll the dough between two sheets of parchment so I never add too much flour. Then I chill the rolled slab before I cut the shapes. That way, the circles are crisp and clean. Right after cutting, I pop the tray into the freezer for 8 minutes. This little pause helps the edges stay sharp in the oven.
If you struggle with sticky dough, try a dusting of cornstarch on your cutter. It prevents sticking but does not toughen the dough like extra flour can. Also, do not overbake. Pull them when the shine is gone and the centers look set. Pale is perfect for this style of cookie.
One more favorite move. I keep the thickness consistent. Aim for 1/4 inch and use two guide sticks or rolling pin rings. It gives a perfect bite and makes decorating smoother too. If you like playful cookie projects, these cozy apple pie cookies are a fun weekend bake as well.
I promise, this extra bit of attention up front pays off when you start icing. Your Snowman Cookies Recipe will look clean and professional without any stress or fancy tools.
Lets Talk Royal Icing
What You Need
Royal icing is what gives these snowmen their smooth, shiny finish. You can make it with meringue powder for simplicity. I mix 4 cups powdered sugar with 2 and 1/2 tablespoons meringue powder and around 6 to 7 tablespoons water to start. Add 1 teaspoon vanilla extract if you like. Stir on low until combined, then beat on medium low for 2 to 3 minutes until it is thick and glossy. Add tiny amounts of water to reach a medium consistency that can be used for both outline and flood with small adjustments.
Consistency Check
For outlining, you want icing that holds a line without melting into itself. For flooding, it should settle smoothly within about 10 to 15 seconds. I keep one bowl on the thicker side for outlines and tiny details like eyes and buttons. Then I thin a second bowl for flooding the body and face. If your icing is too thick, add water drop by drop. Too thin, add a spoon of powdered sugar.
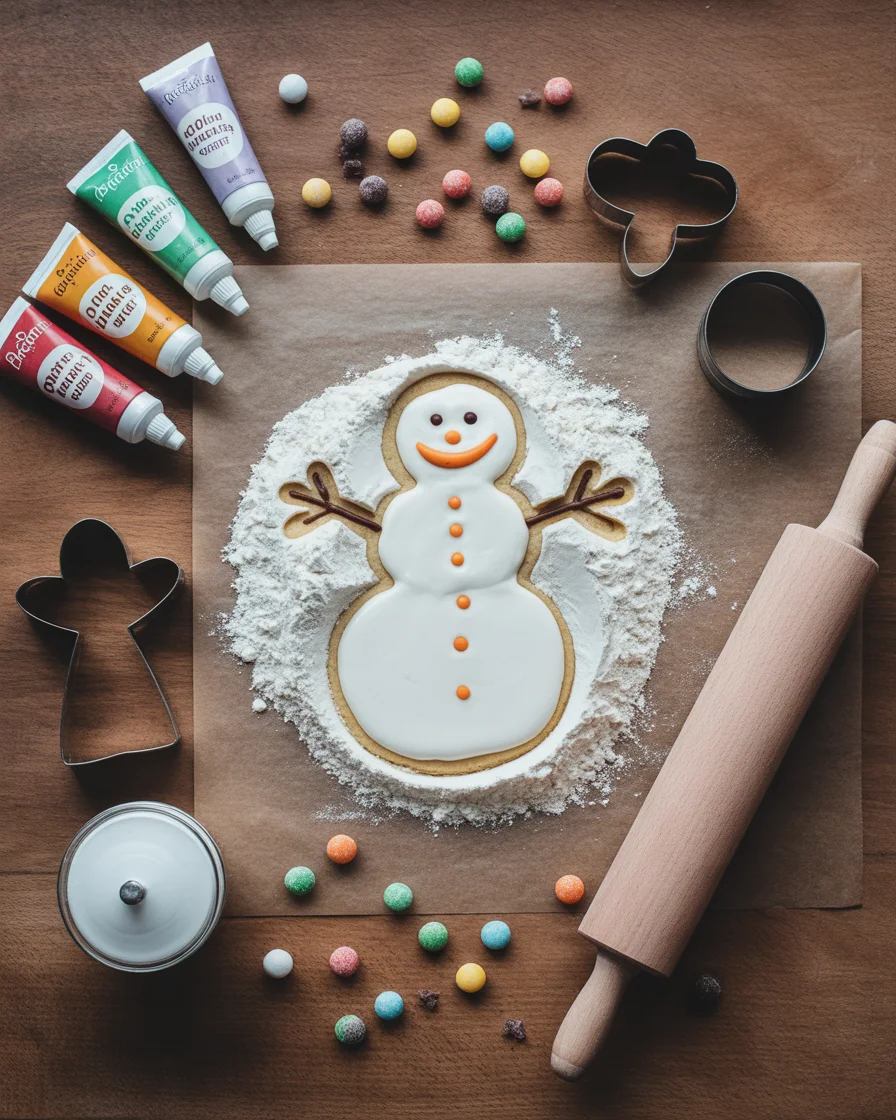
Color guide is simple. Keep most icing white for the body. Tint a small bit black for eyes and buttons, orange for the nose, and your favorite bright color for a scarf. A tiny dot of pink makes cute rosy cheeks. With this, your Snowman Cookies Recipe turns into a canvas for easy, cute designs.
These cookies were a hit at our office party. I am not a skilled decorator, but the simple circles and easy royal icing made them look polished. People kept asking which bakery I used.
Lets Decorate Snowman Cookies
Set up a comfy station. I like to use small piping bags or squeeze bottles. Keep a damp towel nearby to cover tips between uses so the icing does not crust.
Start with the outline. Draw a clean ring around each cookie using your thicker white icing. Let it set for 5 minutes. Then switch to your flood consistency white and fill the circle, nudging the icing to the edge with a toothpick. Let the base dry until it is no longer shiny. If you are patient, an hour is great, but you can start details sooner if your room is cool.
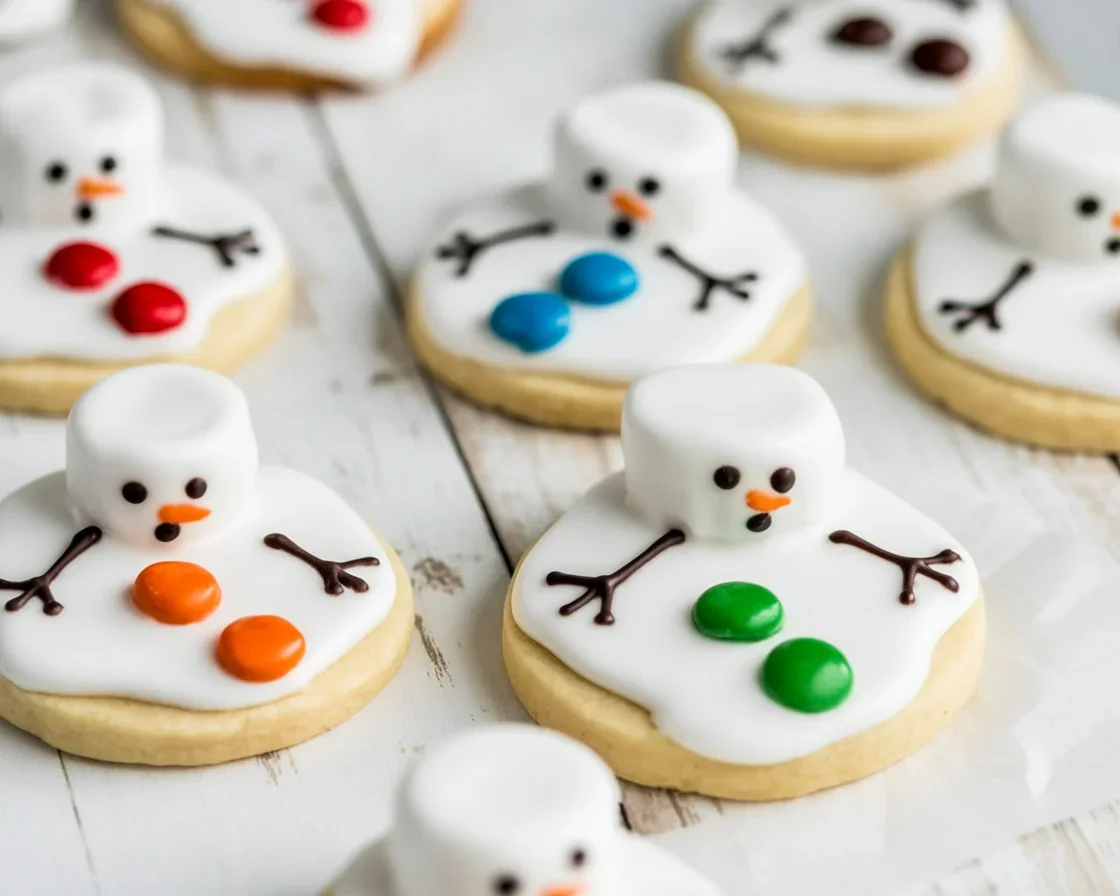
Next, add the snowman details. Pipe a black dot for each eye and three dots down the belly for buttons. Add a tiny triangle of orange for the carrot nose. For the scarf, pipe a bright band across the neck area and add two short tails. You can sprinkle a little sanding sugar on the scarf while it is still wet for sparkle. Optional but adorable. If you like quick festive projects, you will also love these simple 5 minute Christmas bauble cookies for last minute decorating fun.
For a hat, you can draw a small beanie shape with a pom on top or leave it off and let the scarf be the star. Finish with tiny pink dots for cheeks and a soft smile using a food safe marker or a super thin line of black icing. Let the cookies dry uncovered at room temperature until the surface is fully set. Overnight is ideal for stacking.
It is fine if your first few look a little wobbly. That is part of the charm. By the third cookie, your hands will relax and the faces get cuter and cuter. This is the part where the magic of your Snowman Cookies Recipe really shows.
Snowman Cookie Decorating Tips
- Work in small batches so the icing does not crust in your bag.
- Use toothpicks to pop bubbles and nudge icing into corners.
- Practice details on parchment first. Two or three practice noses help a lot.
- Keep a couple of cookies plain white and add faces later if you feel rushed.
- Dry cookies on wire racks to keep airflow even.
- For dairy sensitive friends, bake with plant butter and try these dairy free chocolate chip cookies for variety on your dessert tray.
- Want even more festive shapes for a cookie platter Try classic candy cane cookies for a fun red and white pop.
These little habits make decorating smoother and more fun. The goal is not perfection. It is making something cute that tastes great and makes people smile. With your Snowman Cookies Recipe as the base, you can tweak everything to fit your style and timeline.
Common Questions
How far ahead can I bake and decorate Bake up to 3 days in advance and store unfrosted cookies in an airtight container at room temp. Once decorated, let them dry 12 to 24 hours before stacking.
Can I freeze them Yes. Freeze undecorated cookies up to 2 months. Thaw in the container at room temp, then decorate. Decorated cookies can also be frozen once fully dry. Place parchment between layers.
Do I need meringue powder It helps with structure and shine, but you can make a simple icing of powdered sugar, milk, and vanilla for a softer set. It will not be as sturdy, so handle gently.
How do I get smooth icing every time Use a flood icing that settles in 10 to 15 seconds. Tap the cookie gently and use a toothpick to pop bubbles. Let the outline crust for a few minutes before flooding.
What if I do not own round cutters Use the rim of a glass or a mason jar ring. For mini snowmen, the lid from a spice jar works well too.
Warm Cookies, Warm Hearts
What I love most about this Snowman Cookies Recipe is how approachable it feels. The dough is forgiving, the icing is simple, and the decorating is pure joy. Pair them with a mug of cocoa and you are set. If you want a playful twist, try a melty version like these cute Melted Snowman Cookies for a fun cookie swap surprise. However you frost them, I hope these bring a little calm and a lot of smiles to your kitchen today.
Happy baking, and tag me if you share your frosty faces. I cant wait to see what you create with this Snowman Cookies Recipe.
Snowman Cookies
A fun and festive sugar cookie recipe perfect for decorating during the holiday season.
- Total Time: 25 minutes
- Yield: 24 cookies 1x
Ingredients
- 1 cup unsalted butter, softened
- 3/4 cup granulated sugar
- 1 large egg, room temperature
- 2 teaspoons vanilla extract
- 2 and 1/2 cups all-purpose flour, spooned and leveled
- 1 teaspoon baking powder
- 1/2 teaspoon fine salt
Instructions
- Cream butter and sugar in a large bowl until light and fluffy.
- Beat in egg and vanilla until smooth.
- In a separate bowl, whisk flour, baking powder, and salt. Add to wet mixture and mix on low until combined.
- Divide dough in half, flatten into disks, wrap, and chill for 45 to 60 minutes.
- Roll dough on floured parchment to about 1/4 inch thickness and cut shapes.
- Transfer to a parchment-lined sheet and chill for 10 minutes.
- Bake at 350°F for 8 to 10 minutes, until edges are set.
- Cool completely before icing.
Notes
For neat cookies, roll dough between parchment and chill before cutting shapes. Use cornstarch to prevent sticking.
- Prep Time: 15 minutes
- Cook Time: 10 minutes
- Category: Dessert
- Method: Baking
- Cuisine: American
- Diet: Vegetarian
Nutrition
- Serving Size: 2 cookies
- Calories: 200
- Sugar: 10g
- Sodium: 150mg
- Fat: 8g
- Saturated Fat: 4g
- Unsaturated Fat: 2g
- Trans Fat: 0g
- Carbohydrates: 29g
- Fiber: 1g
- Protein: 2g
- Cholesterol: 30mg
Keywords: snowman cookies, sugar cookies, holiday baking