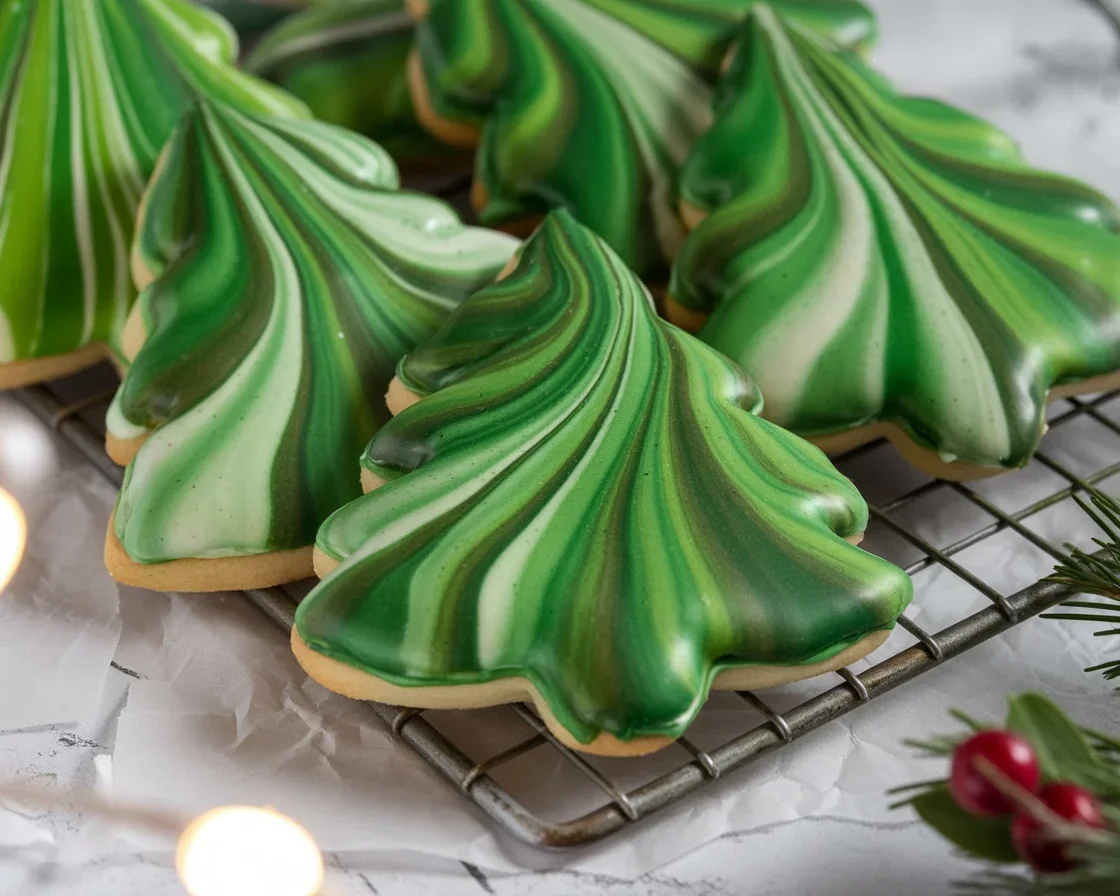
Marbled Christmas Tree Cookies Recipe is that sweet spot where holiday baking meets easy fun. If you’ve ever wanted a cookie that looks like it came from a bakery but feels doable on a busy December afternoon, you’re in the right place. These cookies are crisp on the edges, soft inside, and swirled with gorgeous color. The best part is that the marbling technique is simple, forgiving, and kid friendly. I’ve baked a lot of festive treats over the years, and this one always gets the fastest “wow” at the cookie plate. Let’s make your kitchen smell like butter, vanilla, and pure cheer.

Why You Will Love Marbled Sugar Cookies
There are a lot of holiday cookies out there, but this one hits every note. You get the classic sugar cookie flavor that feels nostalgic, plus a fun marbled effect that makes each cookie look like a tiny piece of art. No special tools, no fancy icing skills, no stress.
The dough is easy to roll, holds its shape when baked, and the cookies cool with a smooth surface that takes icing beautifully. The marbling happens right in the icing bowl, so even if you’re not confident with decorating, you’ll still get awesome results. I honestly think this is the Delicious Marbled Christmas Tree Cookies Recipe You’ll Love for years to come.
If you like sticking with holiday classics, you’ll also love these simple cut-outs here: classic Christmas tree cookies. They’ve got that timeless charm and pair perfectly on a cookie tray with these marbled beauties.
“I made these for our neighborhood cookie swap and people kept asking which bakery I used. The marbling looked fancy, but the process was chill. Total win.”
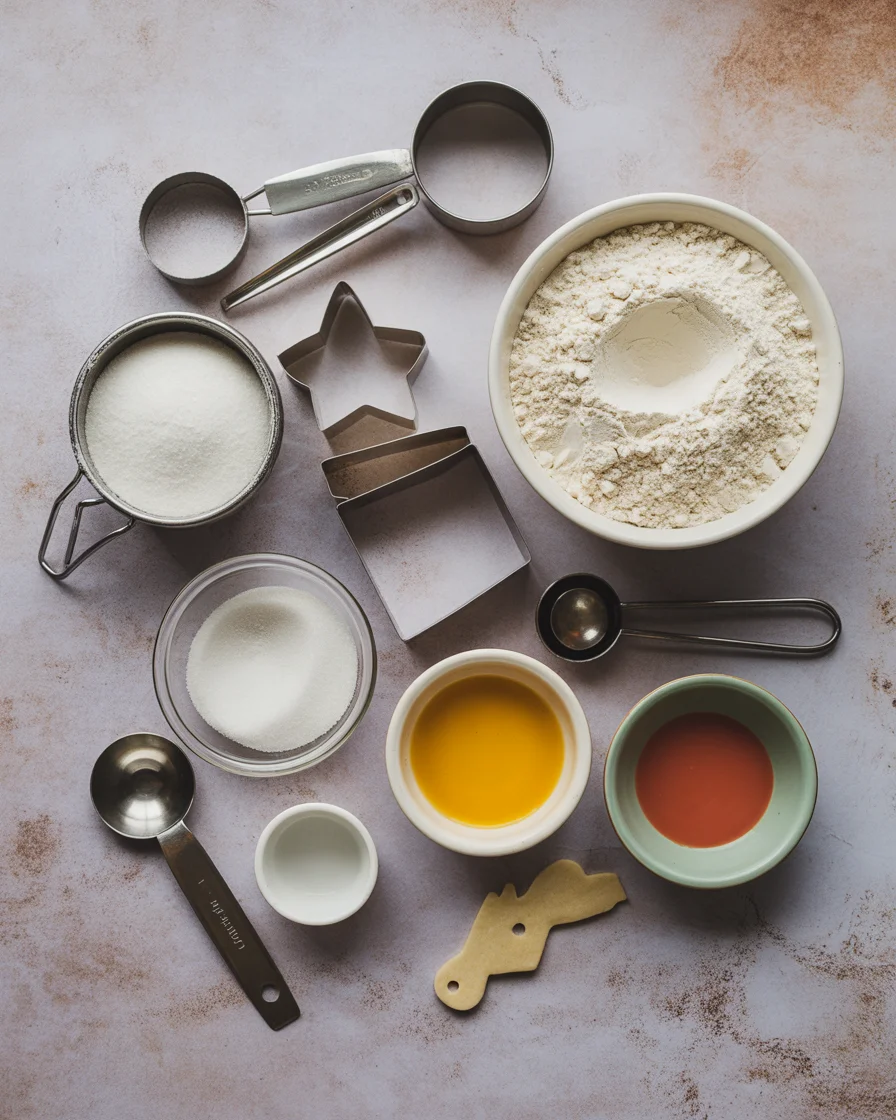
Simple Ingredients
I keep this dough straightforward. It’s buttery, lightly sweet, and sturdy enough to cut cleanly. Here’s what you’ll need for about 24 to 30 cookies, depending on your cookie cutter size.
- Unsalted butter, softened to room temp
- Granulated sugar
- Large egg
- Pure vanilla extract and a touch of almond extract for holiday warmth
- All purpose flour
- Baking powder and a pinch of fine salt
- Royal icing or simple powdered sugar icing for marbling
- Gel food colors in green, white, and a pop of gold or red
- Sprinkles or edible glitter stars, optional
Quick flavor swap if you love fruity cookies: try the almond extract and then taste these apricot rosemary thumbprint cookies next. They’re elegant, bright, and look gorgeous on a mixed cookie platter.
Ingredient Notes You’ll Appreciate
Butter gives flavor and structure, so let it soften for even mixing. Almond extract is optional but gives that bakery cookie vibe. Gel food color works best for marbling because it’s strong and won’t water down your icing. If you need a dairy free cookie option for your cookie exchange, try these dairy free chocolate chip cookies for a delicious swap so everyone feels included.
How to Make Marbled Sugar Cookies
This is the part that turns from dough ball to holiday magic. I’ll walk you through the steps in simple chunks so you can bake with confidence. It really is the Delicious Marbled Christmas Tree Cookies Recipe You’ll Love to tackle on a weeknight or a slow Sunday afternoon.
Chill and Roll
Beat butter and sugar together until light in color. Add the egg, vanilla, and almond extract. Mix flour, baking powder, and salt in a separate bowl, then slowly blend into the butter mixture. The dough will be soft but not sticky. Split into two discs, wrap, and chill for 45 minutes. Chilling helps the cookies keep their shape when cut and baked. Roll to about 1/4 inch thick on a lightly floured surface, then cut tree shapes with a cookie cutter.
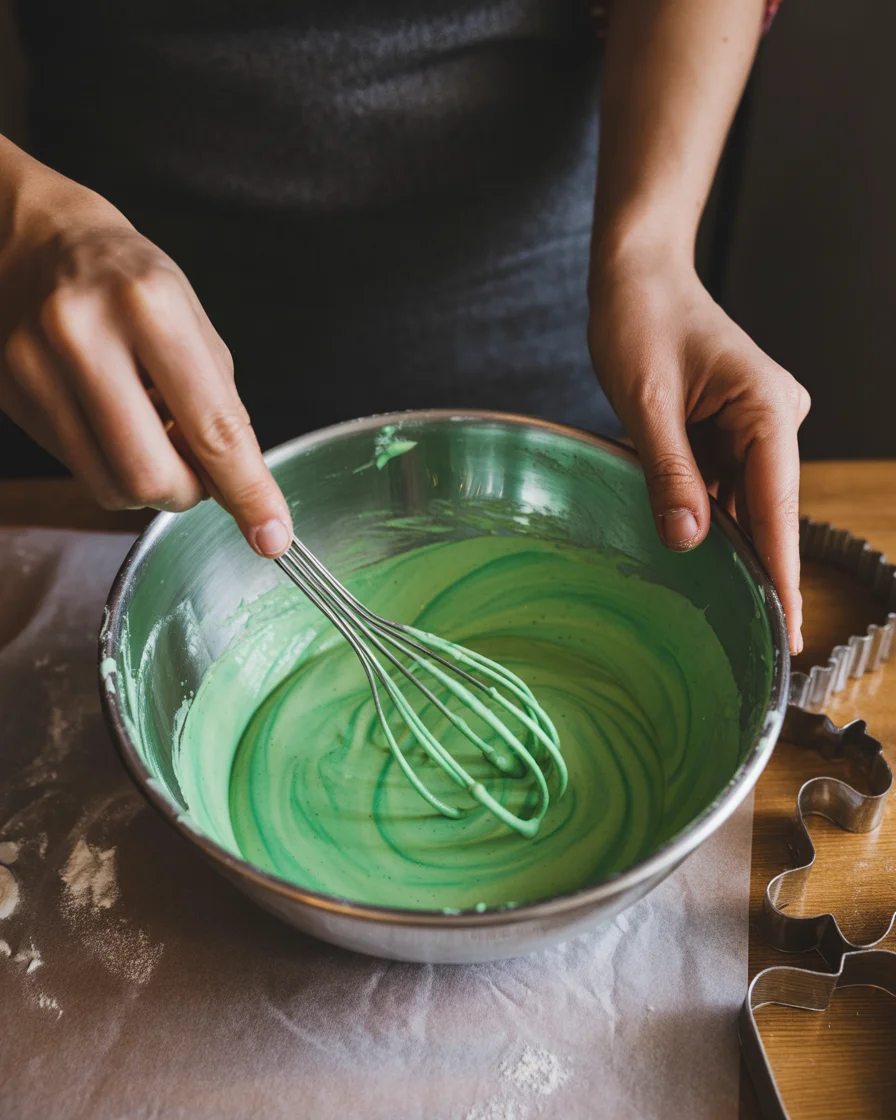
Mix the Marble
Stir up your icing until it’s smooth and slightly thicker than honey. Separate into bowls for white and green. Add a few drops of gel color to the green and stir gently. For marbling, add a small swirl of green into the white bowl and drag a toothpick through it a couple times. Don’t overmix. You want clear swirls. Dip the top of each baked and cooled cookie face down into the icing, lift, let the excess drip, then flip right side up.
Cut and Bake
Place your tree shapes on a parchment lined sheet pan. Bake at 350 F for 8 to 10 minutes, or until the edges are just turning light golden. Let them rest on the pan for a couple minutes, then move to a rack. Cool completely before icing or the marble will slide off.
Decorate and Set
Once dipped, add sprinkles or a tiny star at the top if you like. Set cookies on a rack to dry until the icing crusts over and firms up. If you want a quick second treat to go with these, these 5 minute Christmas bauble cookies are like a festive sidekick. Same cheerful energy, basically zero stress.
Variations & Substitutions
It’s the holidays, so have some fun with it. Here are easy twists that still keep the project simple.
Flavor swaps: Use orange or lemon zest in the dough for a fresh twist. Or add a teaspoon of cocoa to part of the icing for a darker green and a chocolate hint.
Color play: Try white and soft mint green for a snowy look. Add tiny edible pearls to look like ornaments. Mix in a few streaks of red marbling for a candy cane vibe.
Icing options: If you prefer royal icing for a firmer finish, go for it. If you want super fast, powdered sugar, milk, and vanilla get the job done. Add a drop of corn syrup for shine.
Shape swap: Stars and ornaments work beautifully with the same marbling technique.
Hosting a larger holiday spread and want one savory showstopper next to your sweets? A fun pairing is this festive board: Christmas tree shaped charcuterie board. It brings balance so your table has both sweet and savory sparkle.
Tips for Making the Best Marbled Sugar Cookies
These tips keep your cookies neat, your icing glossy, and your process breezy. Honestly, it’s the Delicious Marbled Christmas Tree Cookies Recipe You’ll Love because the tiny tweaks really do make a difference.
- Chill the dough twice: Once before you roll, and again after you cut the shapes for 10 minutes on the sheet pan in the fridge. This helps the cookies bake with sharp edges.
- Roll evenly: Use rolling pin guides or two wooden dowels to keep thickness consistent. Even thickness equals even baking.
- Test your icing: Lift a spoon of icing and let it fall back into the bowl. If it disappears in 12 to 15 seconds, you’re in the sweet spot for dipping.
- Dip gently: Press the top of the cookie flat into the marble, don’t dunk it too deep. A light touch gives clean swirls.
- Refresh the swirl: Drag a toothpick through the bowl after every few dips to keep the marble pattern looking defined.
- Dry time: Let cookies set at room temp for at least 1 hour. If you need to stack them later, wait until the icing is firm to the touch.
- Storage: Keep in an airtight container for up to 5 days, or freeze undecorated cookies for a month. Ice after thawing for the freshest look.
- Plan your platter: Mix sizes and styles for a pretty presentation. Add a couple of classic cookies like these apple pie cookies for cozy variety.
For anyone who loves reliable, no fuss bakes, this is the Delicious Marbled Christmas Tree Cookies Recipe You’ll Love to repeat every year. The method is easy to remember and the results feel special every time.
Common Questions
How do I keep the marbling from blending into one color?
Use gel coloring and stir lightly. Don’t overmix. Refresh the swirl with a toothpick every few cookies.
Can I make the dough ahead?
Yes. Chill the dough up to 48 hours or freeze for up to a month. Thaw in the fridge overnight and roll while still cool.
What if I don’t have a tree cutter?
Use stars, circles, or even a sharp knife to cut triangles. The marbling looks great on any shape.
Do I need royal icing?
No. A simple powdered sugar icing works fine for dipping. Royal icing just dries a bit firmer and shinier.
How do I package these for gifts?
Let the icing dry completely, then place cookies in treat bags with a small sheet of parchment between layers. Tie with ribbon and include a note. For extra festive goodies to add to your gift bag, peek at these fun Christmas tree cookies too.
A Sweet Little Wrap Up for Your Holiday Baking
If you want a cookie that’s gorgeous, simple, and crowd pleasing, this is the Delicious Marbled Christmas Tree Cookies Recipe You’ll Love. The dough is forgiving, the icing is easy, and the marbling looks fancy without being fussy. Pair these with a few other bites, like the charcuterie board I mentioned, and you’ve got a complete holiday spread. If you’re a visual learner and want to see marbling in action, check out this helpful tutorial: Soft Marbled Sugar Cookies with Royal Icing: Recipe w/ Video. Happy baking, and I can’t wait to see your cookie trees shine on the dessert table.

Marbled Sugar Cookies
Delicious Marbled Christmas Tree Cookies that are simple to make and look like they came from a bakery. Perfect for holiday baking.
- Total Time: 60 minutes
- Yield: 24 to 30 cookies 1x
Ingredients
- 1 cup unsalted butter, softened to room temp
- 1 cup granulated sugar
- 1 large egg
- 1 teaspoon pure vanilla extract
- 1/2 teaspoon almond extract (optional)
- 3 cups all-purpose flour
- 1 teaspoon baking powder
- 1/4 teaspoon fine salt
- Royal icing or powdered sugar icing for marbling
- Gel food colors (green, white, and red or gold)
- Sprinkles or edible glitter stars (optional)
Instructions
- Beat butter and sugar together until light in color. Add egg, vanilla, and almond extract.
- Mix flour, baking powder, and salt in a separate bowl, then slowly blend into the butter mixture.
- Split the dough into two discs, wrap, and chill for 45 minutes.
- Roll to about 1/4 inch thick and cut tree shapes with a cookie cutter.
- Stir icing until smooth; add gel color to separate bowls. Mix gently for marbling.
- Dip the top of each cooled cookie into the icing, let excess drip, and flip right side up.
- Bake at 350°F for 8-10 minutes or until the edges are light golden.
- Let cookies cool completely before icing.
- Optionally add sprinkles on top and set to dry until the icing firms.
Notes
Chill the dough twice for better shape retention while baking. Use gel coloring to prevent icing from becoming watery.
- Prep Time: 15 minutes
- Cook Time: 15 minutes
- Category: Dessert
- Method: Baking
- Cuisine: American
- Diet: Vegetarian
Nutrition
- Serving Size: 1 cookie
- Calories: 150
- Sugar: 10g
- Sodium: 100mg
- Fat: 7g
- Saturated Fat: 4g
- Unsaturated Fat: 2g
- Trans Fat: 0g
- Carbohydrates: 20g
- Fiber: 0g
- Protein: 1g
- Cholesterol: 30mg
Keywords: cookies, holiday baking, marbled sugar cookies, Christmas treats