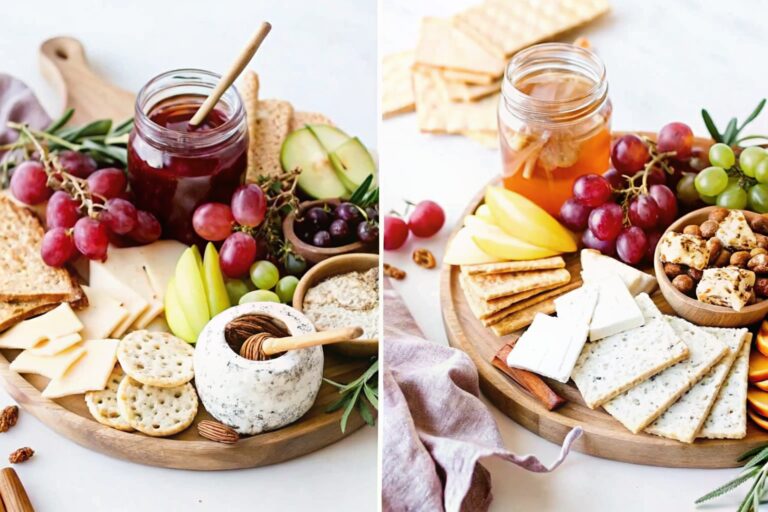
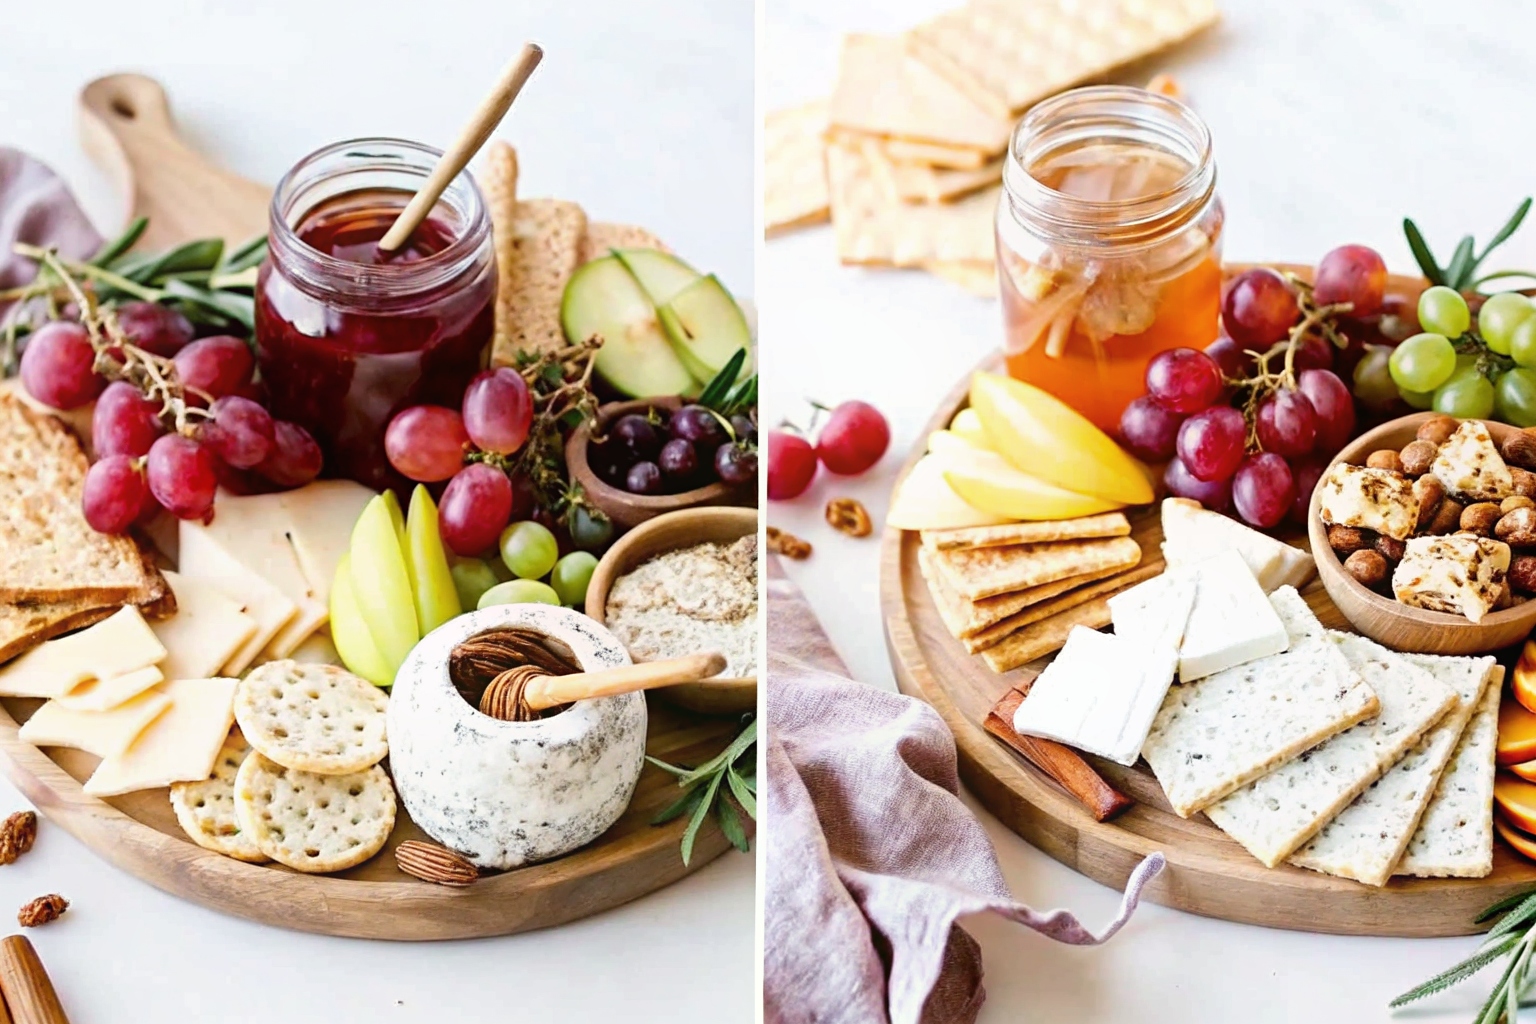
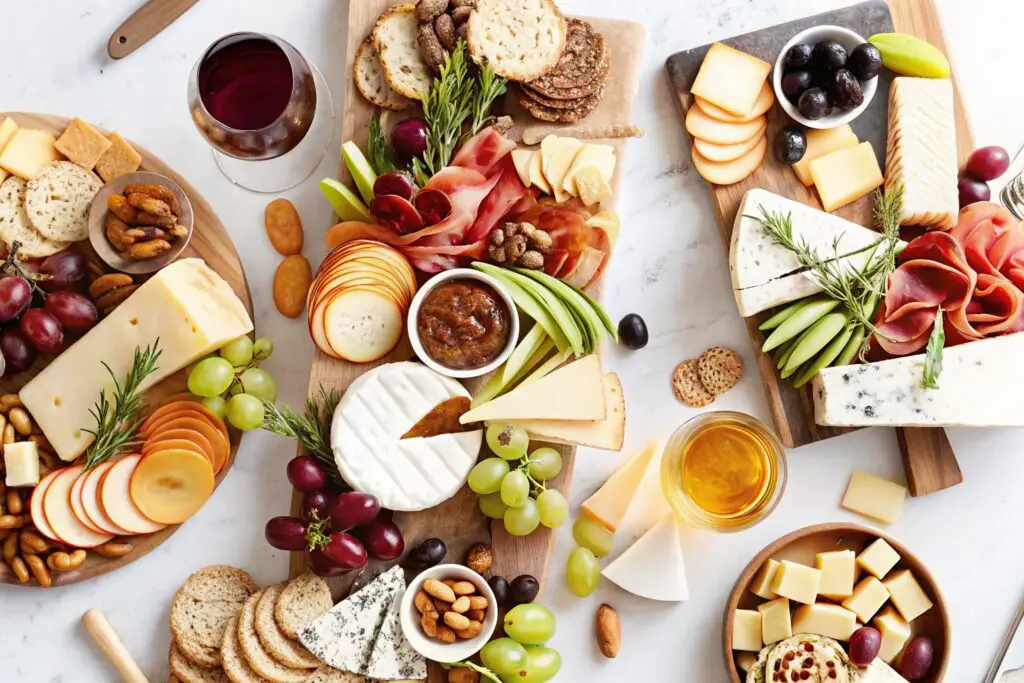
Creating a beautiful and delicious cheese board is more than just a party trick—it’s an art. Whether you’re hosting a holiday celebration, a casual get-together, or a wine-and-cheese night for two, a thoughtfully assembled cheese board can elevate any occasion. It combines flavors, textures, and colors in a way that encourages sharing, conversation, and indulgence. In this guide, we’ll show you how to make a cheese board that looks just as good as it tastes. With expanded inspiration and detail, you’ll learn how to choose the best ingredients, arrange them artfully, pair flavors thoughtfully, and customize your board to suit any theme, season, or dietary preference.
Why Cheese Boards Are Always a Good Idea
Cheese boards are beloved for their versatility, elegance, and simplicity. They require no cooking, minimal prep, and can be tailored to any dietary preference or occasion. They’re perfect for:
- Entertaining: Serve as a centerpiece for your next gathering—social, festive, or intimate.
- Gifting: Wrap one up or assemble it in a box as a thoughtful, edible gift.
- Celebrating: Ideal for holidays, birthdays, anniversaries, or work events.
- Everyday indulgence: Even a quiet evening at home feels special with a mini cheese board.
- Themed nights: Pair with a movie marathon, virtual wine tasting, or book club night.
A cheese board can be as small or elaborate as you want, making it suitable for quick snacks or lavish spreads. Plus, it’s one of the easiest ways to impress guests without spending hours in the kitchen.
Ingredients for the Perfect Cheese Board
Here’s what you’ll need to create a balanced and eye-catching cheese board. This list includes a mix of cheeses, accompaniments, and garnishes to add flavor, texture, color, and visual appeal.
Cheese & Crackers
- 8 ounces white cheddar cheese, sliced
- 4 ounces herbed goat cheese or sheep’s milk cheese
- 8 ounces brie cheese (or another soft-ripened cheese like camembert)
- Crackers or flatbread crisps (choose a variety: multigrain, seed-based, gluten-free, artisanal)
- Bread slices or crostini, optional for heartier bites
Fresh & Dried Fruit
- 2 apples or pears, thinly sliced (toss in lemon juice to prevent browning)
- 8 small bunches of grapes (mix red, green, and cotton candy varieties for color)
- Dried apricots, figs, or dates for sweetness and chewiness
Savory Additions
- 1/2 cup olives (Kalamata, Castelvetrano, or mixed)
- 1/2 cup almonds (marcona almonds or smoked almonds)
- Roasted chickpeas, optional, for crunch and protein
- Cured meats, optional (salami, prosciutto, soppressata) if building a charcuterie combo board
- Pickled vegetables (like cornichons, pickled onions, or beets) for tang and contrast
Sweet Additions
- Tart cherry jam or fig jam (adds a tangy-sweet contrast to cheese)
- Honey, optional, especially good with goat cheese, blue cheese, or brie
- Dark chocolate pieces, optional, for a luxurious sweet bite
Garnishes
- Fresh rosemary or thyme (adds aroma and elegance)
- Edible flowers (optional but stunning in spring and summer)
- Microgreens or arugula, optional, for a fresh touch
How to Build a Cheese Board: Step-by-Step
1. Choose Your Board
Your base can be anything from a rustic wooden cutting board to a marble slab, slate board, or large ceramic platter. Choose a neutral surface that allows the ingredients to pop visually. The size should suit your gathering—larger boards for parties, smaller ones for date nights or solo grazing.
Pro Tip: Round boards create a sense of movement, while rectangular boards offer structure. A lazy Susan adds interactive fun.
2. Anchor with Cheese
Place your cheeses on the board first. Space them out evenly, with enough room around each for slicing and serving. You can pre-slice hard cheeses and leave cheese knives or spreaders next to soft cheeses.
Tips:
- Keep cheeses in odd numbers (3, 5, or 7) for visual appeal.
- Mix textures and flavors: sharp, soft, creamy, tangy, and aged.
- Leave cheeses at room temperature for 30–45 minutes before serving for the best flavor and texture.
3. Add Bowls for Wet Ingredients
Use small bowls or ramekins for items like olives, jams, mustard, honey, or anything juicy. Place these around the board to act as visual “stoppers” and create structure. You can also use small jars or mini dipping dishes.
4. Layer in Crackers and Bread
Fan out your crackers or stack them in small piles. Use different shapes (round, square, rectangular) and flavors (plain, seeded, spiced) to keep things interesting. Place them near cheeses that pair well with them. Add breadsticks or crostini for added variety.
5. Fill with Fruits, Nuts, and Extras
Tuck in apple or pear slices, grapes, dried fruits, and nuts between the cheeses and crackers. These items add color, sweetness, and crunch. Scatter them throughout the board to create a sense of abundance and natural flow.
Don’t forget to add contrast: pair soft cheeses with crisp apples, or tangy goat cheese with sweet jam.
6. Add Texture and Surprise
This is your chance to add extra flair. Think candied nuts, roasted chickpeas, chocolate truffles, or even popcorn. A few unexpected bites make the board more exciting and personalized. Sprinkle sea salt or chili flakes on cheeses or jam for a flavor twist.
7. Finish with Garnish
Garnishes add the final, polished touch. Add sprigs of rosemary or thyme, or sprinkle edible flowers for beauty and fragrance. During the holidays, consider holly leaves (not edible!) or sugared cranberries. In the spring, fresh basil or mint adds a bright pop.
Cheese Pairing Tips
Here’s a quick guide to pair your cheeses with the right accompaniments:
- Cheddar: Great with apples, almonds, fig jam, or Dijon mustard.
- Brie: Delicious with honey, grapes, walnuts, and soft baguette slices.
- Goat Cheese: Pairs beautifully with tart cherry jam, roasted chickpeas, pistachios, and seedy crackers.
- Aged Gouda: Excellent with dried apricots, dark chocolate, or port wine.
- Blue Cheese: Bold flavors go well with honey, pear slices, and candied walnuts.
Seasonal Cheese Board Ideas
Switch up your cheese board based on the time of year to highlight seasonal produce, flavors, and colors. This keeps things fresh and festive.
Spring
- Add radishes, strawberries, asparagus spears, and fresh herbs like mint or basil.
- Include floral cheeses like lavender goat cheese.
- Try lemon-flavored crackers and fresh ricotta.
Summer
- Use juicy peaches, blueberries, cherries, and watermelon balls.
- Include herbed cheeses and burrata.
- Pair with light, crisp white wines or rosé.
- Add edible flowers and basil leaves.
Fall
- Bring in figs, dried cranberries, roasted squash slices, apples, and pears.
- Include pumpkin seed crackers, cinnamon-spiced almonds, and aged cheddar.
- Serve with mulled wine, hard cider, or nutty brown ales.
Winter
- Add spiced nuts, blood oranges, dates, candied ginger, and cranberries.
- Opt for aged cheeses like Gruyère, Manchego, or Stilton.
- Include fig jam, smoked meats, and rustic breads.
- Pair with port, Madeira, or rich red wines.
Wine and Cheese Pairing Basics
A well-paired wine enhances the experience of a cheese board. Match intensity, sweetness, and acidity between the wine and cheese for best results.
Classic Matches:
- Cabernet Sauvignon with aged cheddar, gouda, or hard sheep’s milk cheese
- Chardonnay with brie, triple crème, or camembert
- Sauvignon Blanc with goat cheese or young sheep cheese
- Pinot Noir with Gruyère or alpine-style cheeses
- Port or Madeira with blue cheese or aged gouda
- Sparkling wine with creamy cheeses like brie and soft goat cheese
Cheese Board Presentation Tips
- Use varied heights: Stack or fold items to add dimension and avoid a flat look.
- Mix textures: Combine hard, soft, creamy, crunchy, juicy, and dry.
- Color balance: Distribute colors evenly across the board—avoid clustering all reds or browns.
- Label your cheeses: Use mini chalkboards, card labels, or wooden picks.
- Add serving utensils: Include small knives, forks, tongs, and spoons for jams.
- Leave space to graze: Don’t overcrowd the board—leave small gaps for a natural, accessible layout.
Custom Cheese Board Ideas
For Kids:
- Use mild cheeses like mozzarella, cheddar, or Colby jack
- Add fun shapes (use cookie cutters for cheese or fruits)
- Include fruit snacks, mini crackers, pretzels, grapes, and yogurt-covered raisins
- Swap olives for pickles or cucumbers
For Vegans:
- Use plant-based cheeses and dairy-free dips
- Include hummus, baba ghanoush, or vegan tzatziki
- Load up on colorful vegetables, fruit slices, olives, nuts, and roasted veggies
- Use gluten-free or seed-based crackers
For Brunch:
- Add hard-boiled eggs, smoked salmon, mini croissants, and bagel chips
- Include berries, citrus slices, and soft cheeses like Boursin or ricotta
- Serve with mimosa or iced coffee pairings
- Add jams, yogurt parfaits, or mini muffins
For Dessert:
- Use sweet cheeses like mascarpone or chocolate goat cheese
- Include shortbread, biscotti, and chocolate-dipped fruit
- Add caramel sauce, dried cherries, and nuts
Final Thoughts
Cheese boards are more than just appetizers—they’re edible art, conversation starters, and crowd-pleasers all in one. By choosing a mix of textures, flavors, and colors, and arranging them thoughtfully, you can create a cheese board that’s as enjoyable to make as it is to eat.
Whether you’re crafting a casual spread for a weeknight snack or building an elaborate centerpiece for a special celebration, this guide gives you everything you need to get started. Embrace the creativity, explore seasonal ingredients, and most importantly—have fun.
So grab your ingredients, set the mood, pour your favorite wine, and start building the cheese board of your dreams!
Print
How to Make a Cheese Board: A Step-by-Step Guide to a Stunning Spread
Craft the perfect cheese board with this step-by-step guide! Learn how to choose cheeses, pair with fruits and nuts, and present a stunning spread ideal for any gathering—from elegant parties to cozy nights in.
- Total Time: 20 minutes
- Yield: 1 cheese board 1x
Ingredients
- 8 ounces white cheddar cheese, sliced
- 4 ounces herbed goat cheese or sheep’s milk cheese
- 8 ounces brie cheese
- Crackers or flatbread crisps (variety of shapes and flavors)
- 2 apples or pears, thinly sliced
- 8 small bunches of grapes
- ½ cup olives (Kalamata, Castelvetrano, or mixed)
- ½ cup almonds (Marcona preferred)
- Roasted chickpeas (optional)
- Tart cherry jam or fig jam
- Honey (optional)
- Fresh rosemary or thyme
- Edible flowers (optional)
Instructions
- Select your board or platter based on size of gathering.
- Place cheeses first, spaced out evenly with room for cutting.
- Add small bowls for olives, jams, and other wet items.
- Layer crackers and breads around the cheeses and bowls.
- Tuck in sliced fruits, grapes, nuts, and optional additions like chickpeas.
- Finish with garnishes such as rosemary or edible flowers for color and elegance.
- Serve with appropriate utensils and optional cheese labels.
Notes
Use seasonal produce and vary your cheeses by texture and milk type. Prep fruits in lemon juice to prevent browning. Label cheeses to enhance the guest experience!
- Prep Time: 20 minutes
- Cook Time: 0 minutes
- Category: Appetizer
- Method: No-Cook
- Cuisine: Global
- Diet: Vegetarian
Nutrition
- Serving Size: Varies
- Calories: 400
- Sugar: 8g
- Sodium: 520mg
- Fat: 28g
- Saturated Fat: 12g
- Unsaturated Fat: 14g
- Trans Fat: 0g
- Carbohydrates: 20g
- Fiber: 3g
- Protein: 14g
- Cholesterol: 35mg
Keywords: cheese board, appetizer, holiday spread, entertaining


