
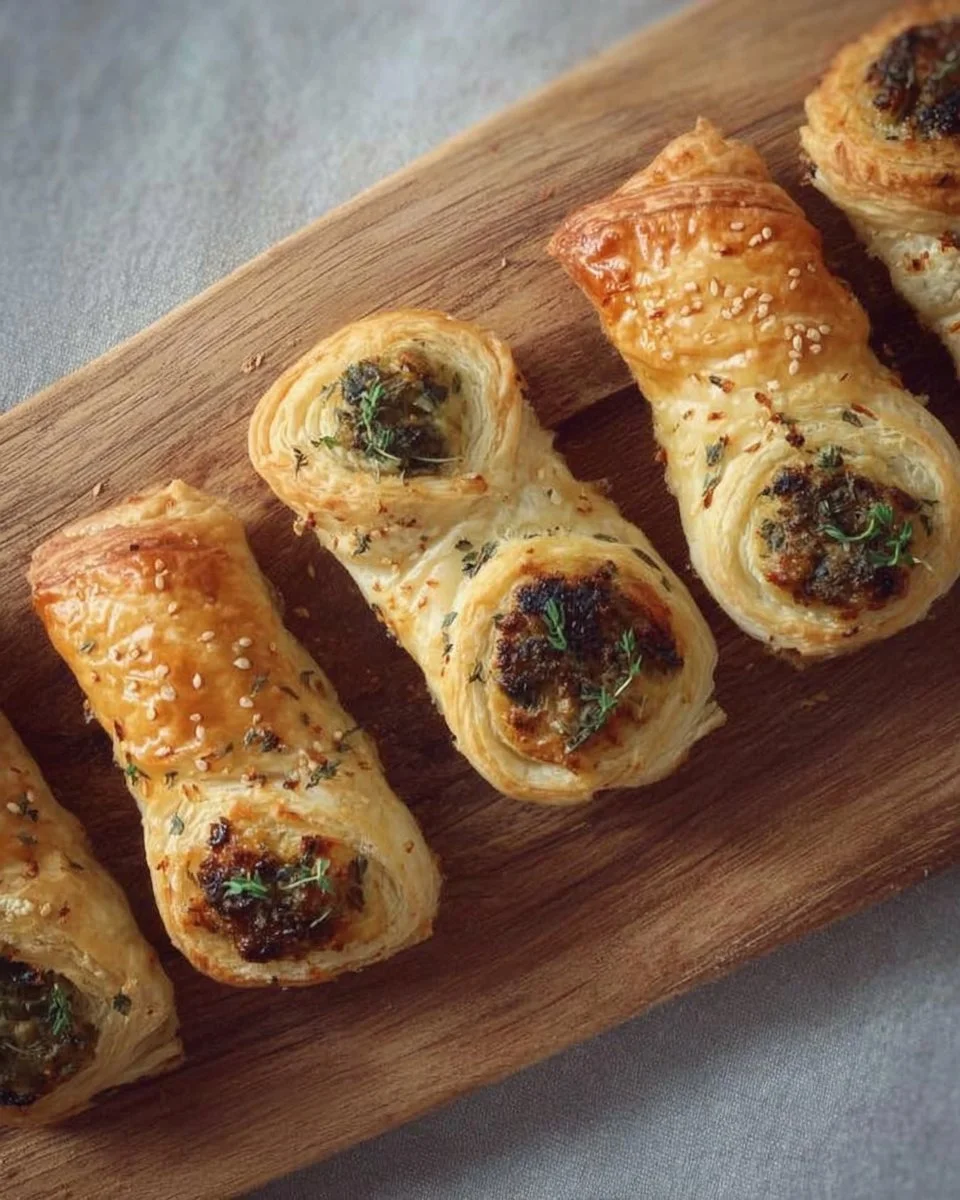
Enjoy these warm stovepipe savory pastries as a tasty snack or a simple meal any day of the week.
INTRODUCTION
Stovepipe Savory Pastries are small filled pastries with a crisp, flaky crust and a warm savory center. They work well for breakfast, lunch, or a light dinner. These pastries can be a healthy version of a bakery treat when you choose lean fillings and whole grain dough. They are a great option for meal prep because you can make a batch, freeze some, and bake later.
If you want a fresh side, pair them with a bright salad like an arugula salad with lemon vinaigrette to add greens and a light bite.
WHY YOU WILL LOVE THIS RECIPE
You will love these pastries because they are easy to make, fun to fill, and work for many diets with small swaps. This recipe gives you a lighter option to store-bought savory pastries. It is great for meal prep since you can freeze dough or finished pastries and bake when needed. You can make them a healthier version by using whole grain flour or less butter. They can be adapted into a high protein meal if you fill them with lean meat, cottage cheese, or eggs. For people watching calories, choose vegetable fillings and control portion sizes for a good option for weight loss plans.
HOW TO MAKE Stovepipe Savory Pastries
This recipe is simple and direct. Follow the basic dough method and then add your favorite fillings. You can make fillings ahead to save time. Use the steps below for reliable results.
EQUIPMENT NEEDED
- Large mixing bowl
- Pastry cutter or two knives
- Rolling pin
- Baking sheet
- Parchment paper or silicone mat
- Knife or pastry cutter for shapes
- Fork for crimping edges
- Plastic wrap
- Optional: air fryer basket if using the air fryer method
Ingredients You’ll Need :
2 cups all-purpose flour, 1/2 cup cold butter, cubed, 1/4 cup cream cheese, softened, 1/4 teaspoon salt, 3-4 tablespoons cold water, Fillings of your choice (e.g., cheese, spinach, mushrooms, ham, or other savory ingredients)
STEP-BY-STEP INSTRUCTIONS :
- In a large bowl, combine flour and salt. Cut in the butter and cream cheese until the mixture resembles coarse crumbs.
- Add cold water, one tablespoon at a time, mixing until dough forms.
- Wrap the dough in plastic wrap and refrigerate for at least 30 minutes.
- Preheat the oven to 375°F (190°C).
- Roll out the dough on a floured surface and cut into shapes.
- Spoon your desired filling onto the center of each shape.
- Fold and crimp edges to seal.
- Place on a baking sheet and bake for 15-18 minutes or until golden brown.
- Serve warm.

HOW TO SERVE Stovepipe Savory Pastries
Serve these pastries warm for the best taste. For a healthy serving, pair one or two pastries with a bowl of soup or a side salad to build a balanced meal. Keep portions in mind: one pastry can be a snack, two can be a light lunch. For a lower-calorie plate, fill them with vegetables, lean protein, or beans to add fiber and keep sugar low. Use a small side of plain Greek yogurt or a light dip to add protein without many extra calories.
A balanced serving idea: one savory pastry, a cup of mixed greens, and a cup of steamed vegetables. This gives you fiber, protein, and healthy fats for a full meal.
STORAGE & FREEZING : Stovepipe Savory Pastries
Cool the pastries completely before storing. Keep them in an airtight container in the fridge for up to 4 days. For longer storage, place the baked pastries on a baking sheet to freeze until firm, then move them to a sealed freezer bag. They freeze well for up to 2 months. To reheat, bake from frozen at 375°F (190°C) for 12–15 minutes or until warmed through. For a quick reheat, use an air fryer at 350°F (175°C) for 6–8 minutes.
SERVING SUGGESTIONS
Serve with healthy sides to make a balanced plate. Try a green salad, roasted veggies, or a light soup. A good pairing for richer fillings is a crisp, acidic side like pickled cucumbers or a lemon green salad. If you choose a meat or cheese filling, add a side of steamed green beans or a quinoa salad to add fiber and balance.
For a warm bowl on the side, these pastries go nicely with a savory butternut squash bowl for a seasonal meal pairing. Try the savory butternut squash burrito bowl for a veggie-forward side that adds fiber and color.
VARIATIONS
-
Healthier version: Swap half or all of the all-purpose flour for whole wheat flour, reduce the butter to 1/3 cup, and use low-fat cream cheese. Fill with spinach, mushrooms, and a small amount of feta. This keeps fiber higher and cuts saturated fat for a lighter option. You can also add grated vegetables like carrot or zucchini to boost fiber and reduce calories. Link to a gluten-free pastry idea if you need it: delicious gluten-free pastries.
-
High-protein or low-carb version: Use almond flour or a mix of coconut and almond flour for a low carb crust. For a high protein meal, fill with cooked lean ground beef mixed with cottage cheese and spices, or use shredded chicken breast and Greek yogurt. For a high protein filling idea, see a similar savory mix at savory ground beef and cottage cheese queso. These options boost protein and lower net carbs for a diabetic-friendly or weight loss plan.
-
Air fryer or oven-baked version: The recipe above is oven-baked at 375°F (190°C). For an air fryer version, preheat the air fryer to 350°F (175°C). Place pastries in a single layer in the basket and cook for 8–10 minutes, checking for color and doneness. Air frying gives a crisp result with less time and is a good lighter option if you prefer a quick finish.
FAQs
Q: Are these pastries good for weight loss plans?
A: Yes, they can be good for weight loss if you choose lean fillings, use less butter, and control portions. Fill with vegetables and lean protein for a lower calorie, balanced meal.
Q: Can I make these pastries diabetic-friendly?
A: Yes. Use whole grain or low-carb flour, avoid sugary fillings, and add protein and fiber to lower blood sugar impact. Choose vegetable and lean meat fillings to keep them diabetic-friendly.
Q: How long do the pastries keep in the fridge?
A: Store in an airtight container for up to 4 days. Reheat in the oven or air fryer for best texture.
Q: Can I freeze the dough or the finished pastries?
A: Yes. Wrap dough well and freeze up to 1 month. Baked pastries freeze for up to 2 months. Bake from frozen or thaw in the fridge before reheating.
Q: What fillings work best for a high protein meal?
A: Cooked chicken, lean ground beef, turkey, cottage cheese, or a mix of eggs and cheese make a high protein filling. Add beans for more protein and fiber.
Q: Can I use leftover steak as a filling?
A: Absolutely. Chop leftover steak and mix with sautéed onions and a light cheese for a rich filling. For a quick pairing idea with steak flavors, see this quick savory noodle idea: garlic butter steak noodles.
MAKE-AHEAD TIPS FOR Stovepipe Savory Pastries
Make dough and fillings ahead to save time. Prepare dough, wrap it, and store in the fridge for up to 2 days or freeze for up to 1 month. You can also make the fillings two days ahead and keep them chilled. On baking day, roll, fill, and bake. This method is great for meal prep and busy mornings. If you want to bake later, place filled pastries on a tray, freeze until firm, then store in a freezer bag. Then bake from frozen for a fast warm snack or meal.

Stovepipe Savory Pastries
Delicious warm pastries with a flaky crust and savory fillings, perfect for any meal or snack.
- Total Time: 48 minutes
- Yield: 4 servings (approximately 8 pastries) 1x
Ingredients
- 2 cups all-purpose flour
- 1/2 cup cold butter, cubed
- 1/4 cup cream cheese, softened
- 1/4 teaspoon salt
- 3–4 tablespoons cold water
- Fillings of your choice (e.g., cheese, spinach, mushrooms, ham, or other savory ingredients)
Instructions
- Combine flour and salt in a large bowl.
- Cut in the butter and cream cheese until resembling coarse crumbs.
- Add cold water, one tablespoon at a time, mixing until dough forms.
- Wrap the dough in plastic wrap and refrigerate for at least 30 minutes.
- Preheat the oven to 375°F (190°C).
- Roll out the dough on a floured surface and cut into shapes.
- Spoon your desired filling onto the center of each shape.
- Fold and crimp edges to seal.
- Place on a baking sheet and bake for 15-18 minutes or until golden brown.
- Serve warm.
Notes
These pastries can be frozen before or after baking for quick meals later. They can be filled with a variety of ingredients to suit your taste.
- Prep Time: 30 minutes
- Cook Time: 18 minutes
- Category: Snack
- Method: Baking
- Cuisine: American
- Diet: Vegetarian
Nutrition
- Serving Size: 1 pastry
- Calories: 220
- Sugar: 2g
- Sodium: 250mg
- Fat: 11g
- Saturated Fat: 6g
- Unsaturated Fat: 4g
- Trans Fat: 0g
- Carbohydrates: 25g
- Fiber: 1g
- Protein: 5g
- Cholesterol: 20mg
Keywords: pastries, savory snacks, meal prep, flaky crust, vegetarian recipes